Filament is not coming out of the nozzle
Video Tutorial:
Detailed Description:
When filament is not coming out of the nozzle, the nozzle may be clogged.
You have three good options for clearing a clogged nozzle:
1. You can pull the clog out of the nozzle using the “soft pull” method
2. You can “floss” the clog out of the nozzle using a nozzle cleaner.
3. You can heat the nozzle and push the clog through the nozzle.
[Pro Tip: Do NOT remove the nozzle or disassemble the hot end of the
printer when you have a clog. Instead, try these three options. If they
don’t fix the problem, complete a troubleshooting request and our
Service Team will help you.]
[Pro Tip #2 : Never leave your printer nozzle at build
temperature (220°C) while the printer is idle. The melted
plastic remaining in the nozzle will “bake” onto the nozzle and
become a hard carbon blockage.]
1. Try to pull the clog out of the nozzle using the “soft pull” method:
a. Turn the machine on, select Setup > Preheat soft pull, and wait until
the temperature reaches 100°C.
b. When the nozzle temperature stabilizes at 100°C, squeeze the
extruder release lever with one hand and pull the filament out of the
extruder with your other hand with a steady, even force.
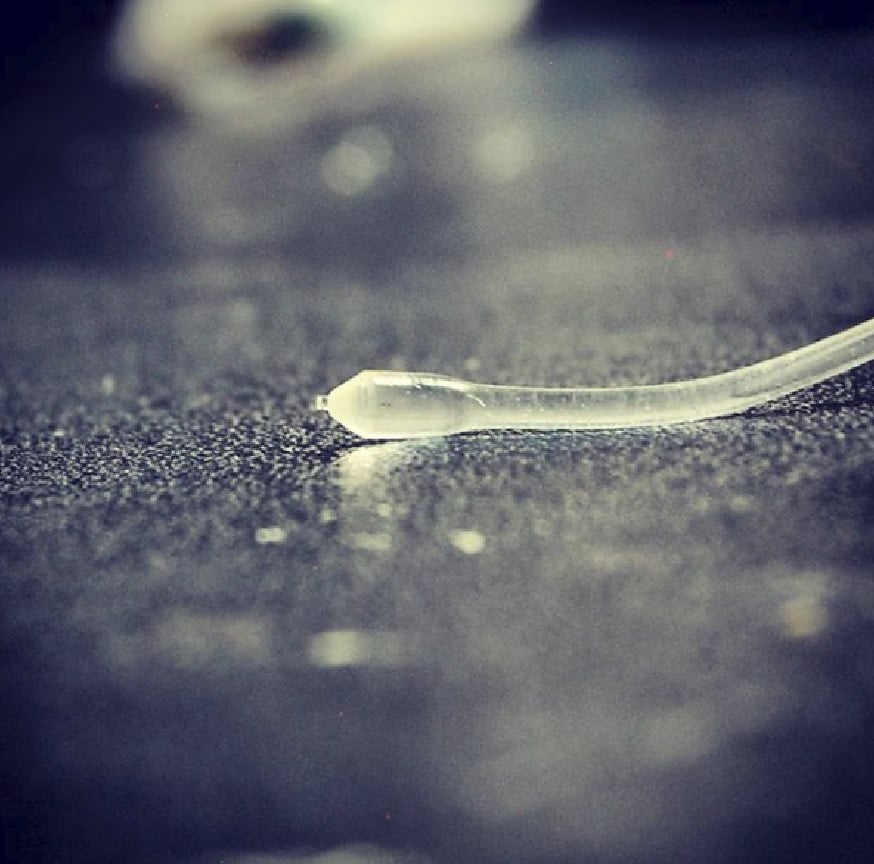
c. Inspect the end of the filament. If the end of the filament has the
shape of interior of the nozzle—a thicker cone-shaped plug—you
have successfully pulled all of the filament out of the nozzle,
including the clog.
d. If the clog did not clear using the “soft pull” method, clip the melted
end of the filament off, reload it, and select Setup > Cooldown and
wait five minutes for the hot end to cool down. Then repeat the soft
pull process.
Soft Pull Example:

[Pro Tip : Every time you change filament on your 3D printer,
remove the filament with the nozzle at around 100°C. This
“soft pull” method usually removes all the old color of filament
from the hot end, so when you begin printing again, the new
color will begin printing immediately.]
2. Use a nozzle cleaner to clear the nozzle:
a. Remove the filament using the “soft pull” method.
b. Select Setup > Preheat PLA. Wait for the nozzle to reach the set
temperature of 220°C for PLA.
c. Raise the Z axis carriage by selecting Controls > Move axis > Move
1mm > Move Z and spinning the knob. (You can also manually rotate
the leadscrew to move the gantry up.)
d. When the nozzle has reached 220°C, use pliers to carefully insert the
nozzle cleaner up into the tip of the nozzle. IT IS VERY HOT, SO BE
CAREFUL NOT TO BURN YOURSELF!
e. Squeeze the extruder release lever with one hand and push the
filament into the extruder manually.
f. Alternate “flossing” with the nozzle cleaner and pushing the filament
through the extruder until a consistent bead of filament is extruded
through the nozzle.
3. Try to push the clog through the nozzle:
a. Select Setup > Preheat PLA. Wait for the nozzle to reach the set
temperature of 220°C for PLA.
b. When the nozzle has reached 220°C, squeeze the extruder release
lever and load the filament. When the filament would normally stop,
keep pushing to manually push the filament out of the hot end
nozzle of the extruder assembly.
c. Watch the filament to ensure it is not curling as it comes out of the
nozzle. After pushing several inches of filament through, it should be
going relatively straight. If it isn’t, turn off the printer and do
another soft pull (step a)

